Search

Showing posts with label Installation. Show all posts

Tuesday, August 27, 2013

Steps to Root Htc One X and Installing Custom ROM


Best answer to the question that 'How to root and flash a custom rom on HTC ONE X' is follows. Rooting allows you to install custom rom and increase your mobile device performance. Easy way to root and flash your HTC ONE X is given by following links. There are some requirements are needed for the whole process. Which will explained and filled with each procedure.

HTC One X is one of the greatest and the most standard android phone in the market. this is the device that has set a standard for HTC and its rival when it arise to Android smartphones. It is spotted with a Quad Core CPU and Super IPS LCD2 Capacitive Touchscreen, this phone surely convey what it pledges. So let us see how to we increase the power of this device and be rotated it into a total gaming system with even more faster CPU and acquire greater control over the other phone Rooting it.

This process will runs you inward the procedures of backing up, Remove the lock of Bootloader by unlocking bootloader, Rooting your Htc one x for programmer access, installing a custom boot-loader, take a complete backup of your Htc One X, and finally Install a custom ROM by flashing.

Before starting the whole the process inform to everyone is to Save all the important data in your phone. This creates sure that even if get wrong going on the the process, you still have your information safe with you.

Requirements (you needed)
  • HTC One X 
  • Windows.
  • HTC Sync software installed.


Steps to Rooting and Installing Custom ROM Htc One X 

tags:-Htc One X rooting,Htc One X custom rom,Htc One X cyanogen mode,
Htc One X fast boot,Htc One X fast root,Htc One X flashing,Htc One X tricks,Htc One X increase performance,Htc One X install any app,Htc One X unlocking

Steps to Rooting and Installing Custom ROM Htc One X


Here are the steps to Root your Htc One X in simple way.Each steps are doing with a careful process.There is no use while you missing a step in the whole process. After the Unlock BootLoader on HTC ONE X ,  you can continue these following steps.

  • In all in One Tool see the Extras part. press on Perm Root and again press Run. This will hand over the SuperSU.zip to your HTC one X.
  • Now look into the Commands part and select Boot into Bootloader.
  • There are 2 recoveries that you can flash. CWM or TWRP this and that together do the same stuff. I suggest TWRP.
  • prefer TWRP and press on Flash Recovery.
  • afterwards flashing, remove the USB cable and press HBOOT in bootloader.
  • Now apply pressure the power button and it will load to other screen.
  • Now apply pressure the Volume Down button until you emphasize Recovery and apply pressure to the power button and select it.
  • go through Backup and back up the boot and system partition.
  • Finishing backing up, go to install and choose the SuperSU.zip.
  •  slide the screen on the under to flash the ZIP. in back of the ZIP flashes, you need to reboot the phone.
  • There is new app names SuperSU in apps drawer After your phone Rooted.
You have successfully rooted your HTC One X.

Tags:- Htc One X simple rooting,Htc One X easy rooting,Htc One X fast rooting,Htc One X secure rooting,Htc One X root without warranty break, Htc One X latest rooting

Sunday, August 25, 2013

Easy Steps to Unlock BootLoader on HTC ONE X


Here is the steps to unlock the Bootloader of your HTC one X. You are already instructed to doing the steps with high concentration and Order.Unloacking of bootloader will allows  you to install custom rom and root your Htc one x. For unloacking the HTC ONE X, you need to get the All in one tool for Htc One X by below location.

Got the Package All in One tool for HTC One X?

Steps to Unloack the Bootloader of Htc One X
  • Take out the archive on your desktop in a folder named ONE_X 
  • Open the outed folder and execute One X
  • On your HTC One X mobile phone go to 'Settings' then 'Developer Options' and 'check tick on USB Debugging'.
  • Press the Install HTC Drivers on  the All in one Htc software from PC . Reastart the Desktop PC after all drivers are installed
  • Again open One X.exe and join your One X to your PC desktop.
  • Go to HTCDev.com and register using your email id.
  • In commands part of the program, select Boot into Bootloader and press on Do Command.
  • This will reboot the phone into bootloader screen which declare FASTBOOT USB.
  • Press the Get Token ID from desktop All in one tool and press Go. This will exhibit you the process to get the Token ID.
  • Now press the right mouse button in the window and select Mark and now start emphasizing   where it tells< < < < Identifier Token Start > > > >  and then it also tell < < < < < Identifier Token End > > > > >  after a short time and then press right button on mouse and it will automatically be copied.
  • Now in the all in one tool press Submit Token ID and this will exposed a new tab.
  • scroll down the page and in the vacant text box paste the copied Token ID. Now Submit.
  • Check for the mail in your registered mail address for Unlock Token.
  • Now get the Unlock_code.bin and guard it.
  • In the All in one tool select on Unlock Bootloader and select the Unlock_code.bin  and the all in one tool will flash it.
  • apply pressure by your finger on volume button up and then power button to receive. Your phone will rebooting.
  • When booting is completed, go through Settings -Developer Options and check tick USB Debugging.
  • join the htc one x again and it will be identified.

Now Go through Easy way to Root your Android HTC One X by Root Your Android Device

tags:- HTC ONE X rooting,HTC ONE X unlocking,HTC ONE X custom rom,HTC ONE X tricks,HTC ONE X increase speed,HTC ONE X increase performance,HTC ONE X increase battery,HTC ONE X tools,HTC ONE X backup tools,HTC ONE X fast operation tools,HTC ONE X install root need apps, HTCONEX rooting,HTCONEX custom rom,HTCONEX featured rom.HTC

Wednesday, August 21, 2013

Android 2014 fast smooth easy handle launcher with stunning features


There are many type of android launchers in market, but each one is lagging and slowing the process of access applications. Here is the best answer to latest and fastest android launcher ever seen.which is wrapped with many features and developed in a different manner. One of the notable feature of Latest model NEXT LAUNCHER is it's smoothness to perform tasks and its behavior to user operations. Awesome user interface are another feature of new next launcher. There are 1000 of brightening themes are generated for the stunning visualization of new launcher.

The 2014 model of new next launcher will have been filling with following features and has a plan to include many other eye catching features.Elegant 3D effect with buttery smooth feel,Original 3D Home Screen switching,Brighting 3D screen preview with impressive animation of screen transferring,Created unique icon modifications by user by varying its design and shape, angle, style and label (Icon Editor).

Together with all good parts from various themes into a single theme by any user,powerful batch apps management with gestures without wasting any processes,Up to eight various gestures attainable in home screen and application starter,inflating all the icons and the widgets to air space (Floating Mode),Improved brightening border effects for home screen switching and many other features.One of notable and important feature of new next launcher is it's fast and smooth performance by taking low resources.. Here we include complete collection of latest and stunning themes of android launcher.


tags:Android fast launcher 2014, 2013 latest smooth launcher, 2013 stunning launcher, latest android easy handle launcher, full version launcher, ram free launcher, memory free launcher, launcher with task manager,launcher with battery manager,launcher with customization

Sunday, August 18, 2013

How to Root Galaxy Note 10.1 for Custom Rom


Galaxy Note 10.1 rooting allows to use large amount of phone memory and many other stunning features that beyond your thoughts. Rooting will allows you to increase the performance of your device. Galaxy Note 10.1 is one the great power android tablet yet announced, equipped with so many awesome   characters. if you own Galaxy Note 10.1 you would be more familiar with device specifications and features, from below, i would be targeting on Rooting your Galaxy Note 10.1 N8000, N8010, N8013 and N8020 for installing custom ROM.

Just to create you obviously, the numbers are practically distinctive model numbers like N8000 and each model has its own various functions and characters. Here are the steps to root your Galaxy Note 10.1 models for installing custom rom with awesome features.Rooting will results to install clockwork mode on your device.

Requirements and warnings

1.USB cable needed.

2. If you have Anti-Virus, Samsung Skies on your PC, disable it for the whole process.

3. Ensure that you have Samsung USB Drivers for your PC. If you have already Samsung Skies in your desktop there is no need, if not USB-Drivers.

4. Ensure that your device's Battery is charged upto 80%.
  • Get the Odin3 V3.07
There are few requirements for your Galaxy Note 10.1 depending on your Galaxy Note model no from below.Now here you need to acquire CF Auto Root tool for your Galaxy Note 10.1, Based on your device model Number = Go to Settings app ->About Device "there your model number".Choose the Correct model number CF Auto Root tool.

Steps For Simple Rooting Procedures for Galaxy Note 10.1 models

Step 1. Take out the zip you have, on your desktop.

Step 2. Run Odin3 V3.07 setup, to start the Odin and start the rooting procedures for your Galaxy Note 10. Now here you required to only tick the Auto Root and F.Reset options. Do not tick the Repartition Option.
.
Step 3. Now Turn-Off your device and Boot it into different Mode, by gripping the Volume down+Power Buttons  during the same time until you see the warning message, now just press the Volume up button.

Step 4. After step 3, Connect your device to PC, here make sure that Odin detect your device. Just note that the ID:COM box it will changed to yellow and the Added, in the message box.

Step 5. You are now ready, Just press the PDA Button and select the CF Auto Root you have from above, then press the START Button to Root your Android Galaxy Note.

Step 6. It around required a 30 to 60 sec to root to your Galaxy Note, When it finished, your galaxy note will automatically restart and Odin will also display the Green bar PASS message.

Now you have a successfully Rooted Galaxy Note 10.1.Now you need to install the CWM Recovery on your device.

tags:Galaxy Note 10.1 rooting simple steps, Galaxy Note 10.1 rooting with warrenty,Galaxy Note 10.1 custom rom,Galaxy Note 10.1 android latest verrsion,Galaxy Note 10.1 fast rooting,Galaxy Note 10.1 new roms,Galaxy Note 10.1 more features adding rom,Galaxy Note 10.1 increase performance,Galaxy Note 10.1 increase phone memory

Thursday, August 8, 2013

How to Custom Rom Update on Galaxy S Duos


Samsung Galaxy S Duos S7562 dominate some authentic characters  like dual SIM (GSM + GSM), runs on Android 4.0 ICS, spotted with 1 GHz Cortex-A5 processor with 768 MB RAM etc. We are here for not describing the features , From Here you can add features to your Samsung galaxy s duos by rooting and installing custom Rom. The package need for custom rom is  ClockWorkMod and you will see this application when you are in recovery mode.  if you want to install CWM Recovery then follow instructions below.

Step 8: Put the “CWM Recovery package file” in the SD card. (Check the rom version) Search various Recovery package file like cyanogen-mod versions and Google.

Step 9: Turn off your phone to boot into recover mode by push and continuing Volume Up + Home button together, and then push the switch off button.

step 10:there is a menu called recovery menu, which is appeared on screen.

step 11: From the recovery menu, select “Install zip from sdcard” and catch the package that you put in the folder “CWM Recovery file” and select it. Whole process will take some time.

Step 12: When the installation steps are is completed select “++Go Back+++” and then choose “reboot system” to reboot your phone.

More Tips and Tricks

Tags:- Galaxy S Duos cwm Rom,Galaxy S Duos cainogen modes,Galaxy S Duos android 4.2.2., Galaxy S Duos upgrading,Galaxy S Duos increase performance,Galaxy S Duos free up more ram,Galaxy S Duos avoid lagging,Galaxy S Duos setup, Galaxy S Duos modes,Galaxy S Duos fast working,Galaxy S Duos how to speed up

Simple steps to root galaxy s Duos steps


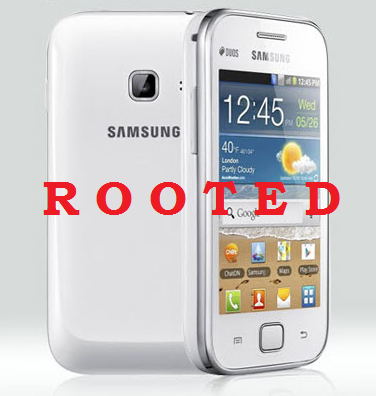
Here is the rooting guide Galaxy S Duos S7562 dominate some new characters like dual SIM (GSM + GSM), runs on Android 4.0 ICS, spotted with the 1 GHz Cortex-A5 processor with 768 MB RAM and much more. We are not here to discuss the features, but apart of that we incorporate some more features by rooting your device. Own this Smartphone? Then for you only, here is the guide on “How to root Samsung Galaxy S Duos S7562“.

1. Make sure your mobile should possess 70 to 80% battery
2. Enable USB debugging mode (Settings-Manage Applications- Development-USB Debugging-check box)
3. Ensure that you have backed up your all important data.
4. Install Samsung Galaxy S Duos S7562 USB drivers.

Rooting Steps For Galaxy S duos Dual Sim smartphone

Step 1: Catch the Samsung Galaxy S duos rooting kit on your computer.

Step 2: turn off the Device, Remove battery and put it back. Pressing and maintain the press  of Volume Down + Home button jointly, and then press the Power button. When you will see the Android Construction logo then stop loose the buttons. Now you are in Mode which for rooting options. Once again press Power button to confirm.
Step 3: Open “Odin.exe” from your pc and join your phone via USB cable with your pc in that mode. If your device is joined successfully the one of the ID:COM boxes will change yellow.
Step 4: select on “PDA” button and select “recovery.tar”from open folder.

Step 5: Please check and ensure that only F. Reset Time and Auto Reboot features are selected in ODIN.

Step 6: Select on the Start button on Odin to start the whole rooting process. Installation will proceeds a few minutes to finish so be patient for the complete process.

Step 7: After completion, you will see the “PASS” notification on Odin and then your phone will reboot automatically. When the device boots up (vibrates) then suddenly remove the battery and after 1-2 minutes start your phone. (MAIN STEP)

Now Your Samsung Galaxy S duos S7562 has been rooted and you can check the Super user package installed on your phone.

INSTALL CUSTOM ROM AND UPGRADE YOUR OS FROM HERE

tags:- galaxy s Duos rooting, galaxy s Duos manual update,galaxy s Duos cwm, galaxy s Duos custom rom,galaxy s Duos 2013 cwm, latest galaxy s Duos Rom,galaxy s Duos fast rom,galaxy s Duos speed rom,galaxy s Duos featured rom,galaxy s Duos os changing,galaxy s Duos install new 2013 OS rom.


Saturday, August 3, 2013

Downgrading All Xperia ics 4.0.4 to old gingerbread 2.3.4 Stock OS

                 After upgrading the OS of your Android Device, the device may sometimes start to have problems with some applications which uses services like WiFi, camera etc. In such cases, you have to restore the stock OS back to your android device. Even if many users know how to upgrade the OS to a latest version, many of them are unaware of the downgrading process. The instructions given here are recommended only for Sony Xperia users. For the technique provided here, there is no need to root your device or unlock the boot loader.

The instructions for the downgrading are given below.

Required Files
  • Flashtool
  • Android OS that you need to Install in ftf format
  • Your devices ADB driver


Create a back up of all your data as the downgrading may flash your device.

  •  Install the flashtool into the C drive
  •  Goes to your phone settings tick "unknown sources" and Enable USB debugging [in 4.0.4, in Phone select Settings >> development options(last)
  •  Get the ftf OS for your android device from above link and place it into your Computer's C:\Flashtool\firmwares folder.
  •  go to  C:\Flashtool\drivers  then execute the exe file and install the drivers for your device
  •  go C:\Flashtool and open FlashTool.exe and choose flashmode..
  •  select your ftf file to flash.. And press OK..as shown below picture


  • Then you can see the process going on in flash tool
  • Wait until you will see the window looked as below picture

  • 9.Follow image The flashtool will argue you to connect your phone in flash mode... There is a specific key for each device [ Get key for each device by read below] and For xperia x10 mini as figure and xperia mini   as the key is "volume DOWN".
VOLUME DOWN BUTTON
mini, mini pro, ray, active, live with Walkman, S, P, U, sola
BACK BUTTON 
play, arc, arc s, neo, neo v, pro,x8, x10, x10 mini, x10 mini pro

  • Keep holding the key until flashtool indicate to release the key..
  • You can see the process in window.
  • Wait till the process in window to display as 100%.. 
  • At last you can see the flashing completed message in window
  • Then you can restart your phone...
Please note that, the first boot may take a more time..


Tags: Sony Xperia OS downgrading, ICS to gingerbeard OS

Friday, August 2, 2013

Simple Technique to Root And Un-root android Devices


          Rooting your android device will enable you to customize the stock Operating System that is available with your android device at the time of purchase. The rooting procedure will enable the user to enhance the functionality of the android device by upgrading it with a custom OS.

Using the z4root is one of the simplest ways for rooting your android device. By using this app, the user can root almost all the available android phones except those which are running Android 2.2 Froyo. There are several other methods by which one can root the android device, but most of them require enough technical knowledge to understand and follow the rooting procedures.

How to root your android mobile phone

  • Get the file z4root from Google.
  • Install the z4root into your Android Device
  • Enable USB debugging mode (Menu-Settings-Applications-Development).
  • Launch Z4Root on your android phone. Then Select the Root button.
  • Wait for few second for rooting process. Android phone will automatically reboot once root complete. Enjoy your root android phone.


How to un-root your android mobile phone

  • Start Z4Root Application on your android Device. Then Select on the Unroot button.
  • Wait for few second for the unroot process.
  •  Now your phone has been unrooted.

Tags: Rooting procedure of android device, unroot, z4root, simple rooting techniques


Thursday, August 1, 2013

Root Procedures For Sony Xperia x10 Mini with WiFi Tethering Hotspot


The rooting procedure explained here is done by using SuperOneClick root tool. After this rooting procedure, the user can install xRecovery image and thereby enable JIT. The Steps for rooting procedures is given below.


  • How to Root SE Xperia X10 Mini Pro

            First get the required file for rooting from here. Enable USB debugging in your phone.(Setting -> application -> development -> Usb debugging). Now connect your android device to the pc and launch the SuperOneClick Tool. Select Root and wait for the process to complete. once the process is completed, reboot your phone.


  • Steps to enable wifi tethering and wifi hotspot in SE xperia x10 mini pro


          Get the Barnacle WiFi Tether application from the Android Market or Google Play Store.Then Goto settings, select SSID and give a desired name to your network there to be identified by the clients. It should be the same as the name of your Wi-Fi hotspot connection you create. Goto wireless security and from there, enable WEP and choose a desired password for the connection you have created now. Now go back and select the Start button on barnacle Wi-Fi.


Tags: Rooting Sony Xperia x10 mini, Wifi Tethering, rooting procedures of sony

Wednesday, July 31, 2013

Simple way to change OS on your Android Device

             As the number of Android Devices used in daily life is increased, the need for customization of the devices also increased. Many Android users may be fed up with the custom Operating System available when the Device is purchased. The main reason behind this is that the stock OS may include unwanted services and other vendor specific applications that may limit the device from providing optimum performance.

 CyanogenMod is a no charge, community constructed aftermarket firmware allotment of Android Versions. It is developed with an intention of extending the performance and dependability over inventory Android for your Android device. CyanogenMod is established in the Android Open Source Scheme along with the contributions made by other developers in the community. It can be further customized and optimized to install any Google Application.

Follow the Steps given below to install a custom OS in your android device.


  •     Root your Android mobile phone (use this also to root: Super one click to pc)
  •     install Flash tool on your pc and flash the device with it.
  •     Install xRecovery From Flash tool
  •     Get boot menu after a reboot(Depends upon your mobile model):Eg-Sony Ericsson Xperia x10           mini pro shows menu when you hold or repeatedly pressing back button during the time of Sony         Ericsson logo appears (rebooting time).
  •     Perform a current backup of your system from boot menu
  •     Copy Android OS that you download earlier to SD-card.(search cyanogen mode different os in         Google)
  •     From boot-loader menu: Format the system(wipe data factory reset),Advanced menu:-clean wipe       cache.
  •     From boot menu Select install zip from SD-card
  •     choose zip from sd card
  •     Now the phone will start to installing New Operating system
  •     Enjoy with android

Tags: CyanogenMod, install custom OS in android, Android OS Installation, Change OS in Android